- How does the Elvis operator work? The formal name for the Elvis
operator is the Tertiary Conditional operator. This operator consists of a
question mark (?) and a colon (:). Rewrite this
if..else statement using the
Elvis operator:
var n = 247;
var size;
if (n >= 100) {
    size = "large";
}
else {
    size = "small";
}

// Answer:
var n = 247;
var size = (n >= 100) ? "large" : "small";
// Output: large
- What do these JavaScript methods do?
document.querySelector  document.querySelectorAll
document.createElement  obj.appendChild
Answer:
document.querySelector -- returns a JavaScript object
that represents the first element
that matches the selector in the DOM.
document.querySelectorAll -- returns an array of JavaScript objects that
represent all of the elements that match the selector in the DOM.
document.createElement -- returns a
new JavaScript object that represents a type constructor.
obj.appendChild -- appends the JavaScript object, which
is passed to the method, to the inner HTML of the JavaScript object
obj.
- Look at the source code for Practice Problem 3 (Mountains
Example) at the end of the Feb 16 Notes.
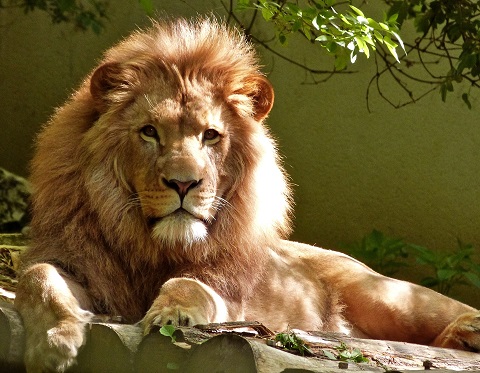
- Use radiobuttons with labels elephant,
lion, monkey,
rhinoceros to display
images of the same name with .jpg extension. Use a
single image element defined like this:
<img id="img1">
Include this line in your CSS file:
img { width: 200px; background-color: #C0C0C0; }
Answer:
<!DOCTYPE html>
<!-- Source code file: index.html
     Script for Exercise 1        -->
<html lang="en">
    <head>
        <meta charset="UTF-8">
        <title>Exercise 1</title>
        <link rel="stylesheet" href="styles.css">
        <script src="script.js"></script>
    </head>
    <body>
        <h1>Exercise 1</h1>
        <img id="img1"><br>
        <input type="radio" id="ele" name="animal"
               value="elephant"> Elephant<br>
        <input type="radio" id="lio" name="animal"
               value="lion"> Lion<br>
        <input type="radio" id="mon" name="animal"
               value="monkey"> Monkey<br>
        <input type="radio" id="rhi" name="animal"
               value="rhinoceros"> Rhinoceros
    </body>
</html>
---------------------------------------------------
/* Source code file: styles.css
   Stylesheet for Exercise 1    */
body { font: 120% verdana, sans-serif; }
img { width:200px; height: 150px;
      background-color: #C0C0C0;}
---------------------------------------------------
// Source code file: script.js
// Script for Exercise 1.
function showAnimal(e) {
    var animalName = e.target.value;
    var imageName = "images/" + animalName + ".jpg";
    document.getElementById("img1").src = imageName;
}

function init( ) {
    var radEle = document.getElementById("ele");
    var radLio = document.getElementById("lio");
    var radMon = document.getElementById("mon");
    var radRhi = document.getElementById("rhi");

    radEle.addEventListener("click", showAnimal);
    radLio.addEventListener("click", showAnimal);
    radMon.addEventListener("click", showAnimal);
    radRhi.addEventListener("click", showAnimal);
}

window.addEventListener("load", init);
===================================================
- Redo Exercise 2 to use a dropdown menu with <select>
and <option> elements instead of radio buttons.
Answer:
===================================================
<!DOCTYPE html>
<!-- Source Code File: index.html
     HTML file for Exercise 2 -->
<html lang="en">
    <head>
        <meta charset="UTF-8">
        <title>Exercise 2</title>
        <link rel="stylesheet" href="styles.css">
        <script src="script.js"></script>
    </head>
    <body>
        <h1>Exercise 2</h1>
        <img id="img1"><br>
        <select id="sel1">
            <option value="elephant">Elephant</option>
            <option value="lion">Lion</option>
            <option value="monkey">Monkey</option>
            <option value="rhinoceros">Rhinoceros</option>
        </select>
    </body>
</html>
-----------------------------------------------------
/* Source Code File: styles.css
   Stylesheet for Exercise 2 */
body { font: 120% verdana, sans-serif; }
img { width:200px; height: 150px;
      background-color: #C0C0C0;}
-----------------------------------------------------
// Source Code File: script.js
// Script for Exercise 2.
function showAnimal( ) {
    var animalName = document.getElementById("sel1").value;
    var imageName = "images/" + animalName + ".jpg";
    document.getElementById("img1").src = imageName;
}
function init( ) {
    var select1 = document.getElementById("sel1")
    select1.addEventListener("change", showAnimal);
}
window.addEventListener("load", init);
=====================================================
- Redo the previous exercise using anonymous event handlers
in arrow notation.
Answer. Here is the revised script:
=====================================================
// Source code file: script.js
// Script for Exercise 3.
window.addEventListener("load", ( ) => {
    var select1 = document.getElementById("sel1");
    select1.addEventListener("change", ( ) => {
        var animalName = document.getElementById("sel1").value;
        var imageName = "images/" + animalName + ".jpg";
        document.getElementById("img1").src = imageName;
    });
});
=====================================================
- Start with this HTML paragraph:
<p>Lorem ipsum odor amet, consectetuer
adipiscing elit. Maecenas ipsum ligula
tempor lorem mus integer. Platea nisi
fusce placerat mus magnis ipsum. Ipsum
sed platea tincidunt, magnis et commodo.
Orci mattis tempus amet himenaeos
lobortis dis iaculis accumsan. Id
suscipit proin laoreet vel eleifend morbi.
Pharetra erat id egestas ultricies ad
tempus feugiat aliquet eu. Phasellus per
vestibulum ut curabitur himenaeos
consequat senectus quisque magnis.
Fusce posuere vulputate sem egestas
cursus dignissim duis.</p>
Define a CSS class that sets the <span>
element to bold, red, and Chiller font. Apply this
class to five words in the paragraph.
Answer:
===============================================
<!DOCTYPE html>
<!--  Source Code File: index.html
      HTML code for Exercise 4 -->
<html lang="en">
    <head>
        <meta charset="UTF-8">
        <title>Exercise 4</title>
        <link rel="stylesheet" href="styles.css">
    </head>
    <body>
        <h1>Exercise 4</h1>
        <h2>Lorem Ipsum Text</h2>
        <p>Lorem ipsum odor amet, consectetuer
           adipiscing elit. Maecenas ipsum ligula
           tempor lorem mus integer. Platea nisi
           fusce <span class="r">placerat</span> mus
           magnis ipsum. Ipsum sed platea tincidunt,
           magnis et commodo. Orci mattis tempus amet
           himenaeos lobortis dis iaculis accumsan. Id
           suscipit proin <span class="r">laoreet</span>
           vel eleifend morbi. Pharetra erat id egestas
           ultricies ad tempus feugiat aliquet eu.
           Phasellus per <span class="r">vestibulum</span>
           ut curabitur himenaeos consequat senectus
           quisque magnis. Fusce posuere vulputate sem
           egestas cursus dignissim
           <span class="r">duis</span>.</p>
    </body>
</html>
-----------------------------------------------
/* Source Code File: styles.css
   Exercise 4 */
/* Define CSS Class */
.r { font: bold 200% Chiller, sans-serif;
     color: red; }
===============================================